Healthyish Gluten-Free Pumpkin Muffins

pumpkin muffins1.jpg

Happy first day of fall! I’m really excited about these pumpkin muffins and fully expect I’ll be baking a few rounds of them during this new season. They took a few rounds of testing, but the end result came out just right.

pumpkin muffins2.jpg

I’m deeming them healthyish because they are just that. They are gluten-free, dairy-free and free of refined sugars. They are full of real whole ingredients. This doesn’t make them zero calories, but no one should be eating zero calories. Slather one up with some almond butter and serve with a side of fruit for a great balanced breakfast or snack.

pumpkin muffins5.jpg

Healthyish Gluten-Free Pumpkin Muffins
Yields 14-16 muffins

Ingredients:
3/4 cup coconut sugar
½ cup coconut oil, measured then melted and cooled 
2 eggs
1 cup pumpkin puree
¼ almond milk
2 tsp. vanilla extract
2 cups gluten-free oat flour (see notes)*
2 tsp. pumpkin pie spice
1 ½ tsp. baking soda
¼ tsp. salt

Directions:
Preheat your oven to 350 degrees. Line a standard muffin tin with paper liners or grease your tin and lightly flour with oat flour. If you don’t have muffin liners, I like to cut 3x3 inch squares of parchment paper and then press into each muffin space.

In a large bowl, whisk the melted and cooled coconut oil and 3/4 cup coconut sugar. Whisk in your eggs, one at a time. Add the pumpkin puree, almond milk, and vanilla extract, whisking to combine. 

With a spatula, stir the oat flour, pumpkin pie spice, baking soda, and salt into the wet ingredients. Using an ice cream scoop, scoop the batter into the muffin tin, filling to the top. Sprinkle a small amount of coconut sugar over the top of each.

Bake for 20-23 minutes or until a toothpick comes out clean. Remove from the oven and let cool in the pan.

Notes:
Making oat flour at home is so easy and affordable. For 2 cups of oat flour, simply ground 2 1/2 cups of Gluten-Free Old Fashioned Rolled Oats in your blender. If you can’t find gluten-free that is totally fine your muffins will just not be free of gluten, but will turn out the same. I love this huge bag from Trader Joe’s which is only $3.99 in-store.

pumpkin muffins3.jpg
pumpkin muffins4.jpg

Annie

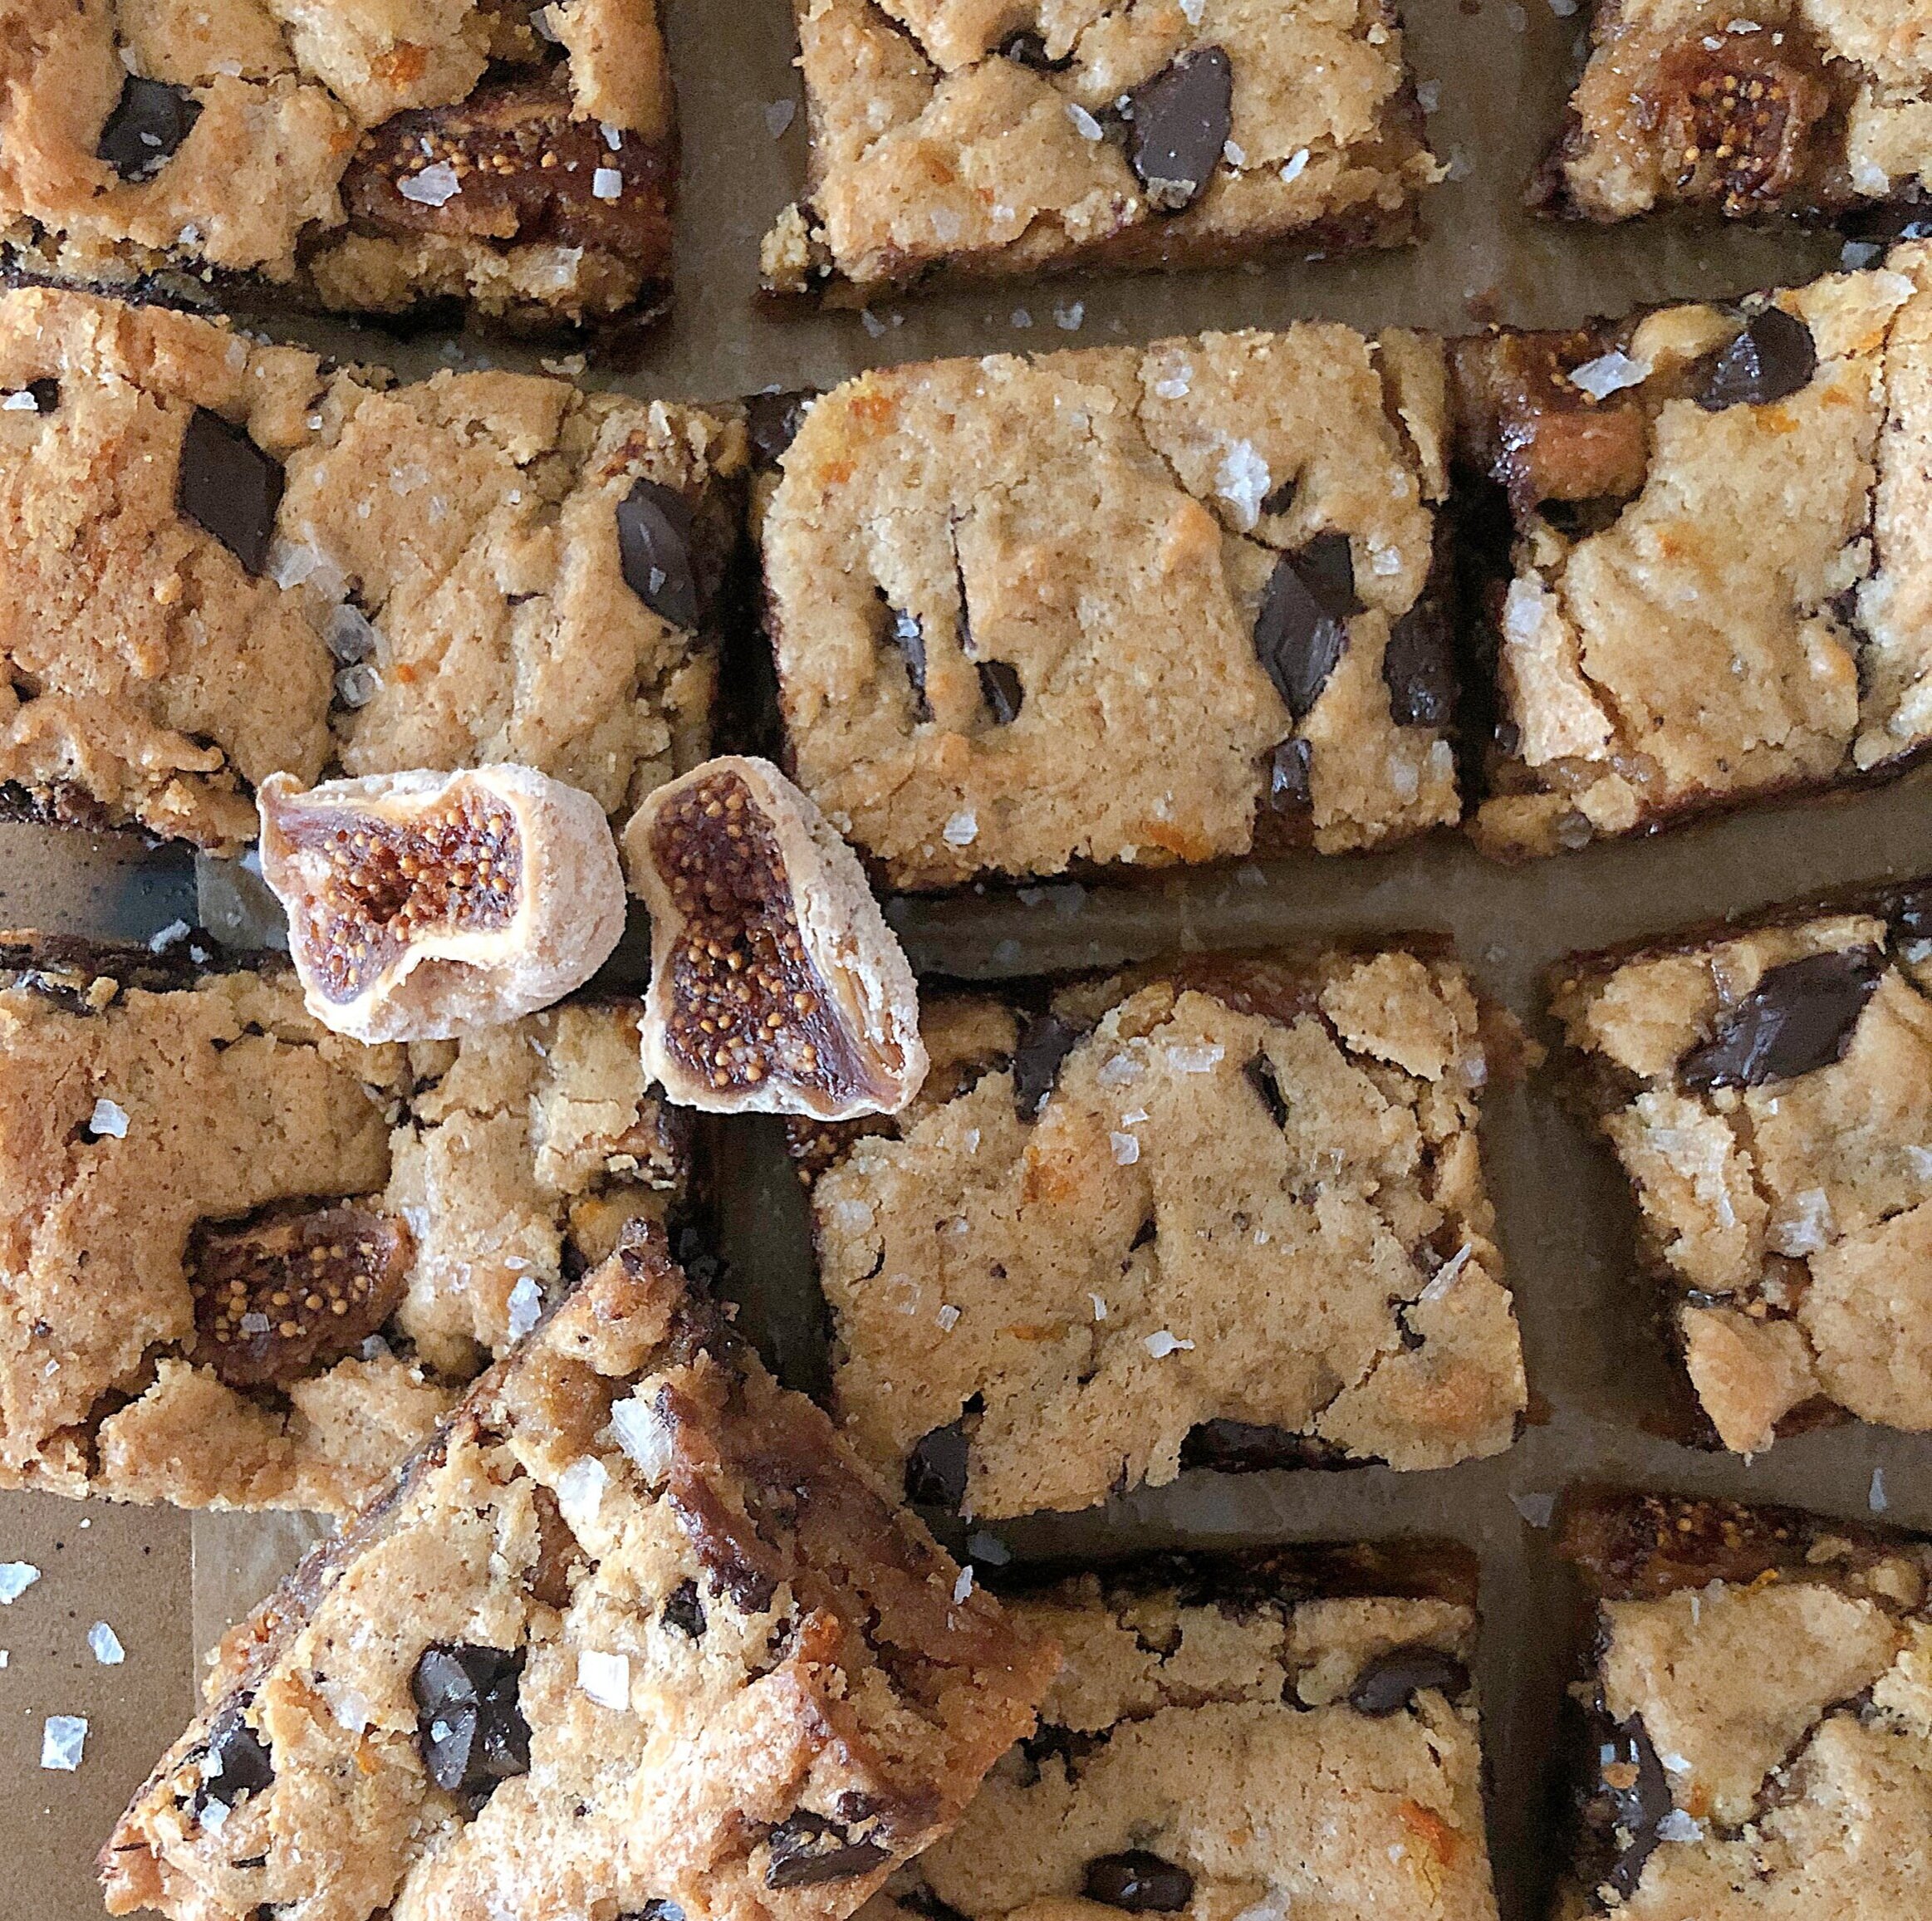
Dark Chocolate, Orange, and Fig Blondies

IMG_7775.jpg

It’s been a baking week and it’s been great. I honestly haven’t baked in forever and it is truly my therapy. I’ve been feeling pretty creative with flavors and combinations and I’m leaning in. The Blueberry Cardamom Pop-Tarts from this week are delicious, these blondies are delicious. It’s been a tasty week y’all. I decided to make these blondies in an effort to update this ancient TAB recipe for Salted Caramel Fig Blondies. I love figs, but the caramel wasn’t necessarily a flavor I wanted to pair, so in comes this brand new recipe.

IMG_7777.jpg

If you follow me on social media, you may have seen the quest to get these blondies just right. I sought out to make them with fresh figs and not a lot of knowledge on blondies, and it was a fail. The fresh figs led to too much water content and I didn’t beat the sugar and eggs enough, so they came out a goopy mess on the inside. After researching blondies better and swapping from fresh to dried figs, these blondies found their truth!

IMG_7781.JPG

Let’s talk variations, because while I’m here for this combo these blondies are also very versatile. Chocolate and orange can be jarring for some. I’ve always been a fan of the combo and I think the orange is just the touch something this sweet needs, but if it’s not for you, ditch it. Fresh figs have a short 2-3 month season, but dried figs can be found year round. However, dried cranberries or dried cherries would be so delicious here. If you’re feeling nutty, throw in some walnuts.

IMG_7779.jpg

Dark Chocolate, Orange, and Fig Blondies
yields 12 blondies

Ingredients:
½ cup brown sugar
½ cup granulated sugar
½ cup (1 stick) unsalted butter, melted
1 egg
zest from ½ an orange
1 tsp. vanilla extract
1 cup flour
½ tsp. baking powder
¼ tsp. kosher salt 
6 dried figs, chopped
½ cup chopped dark chocolate (I used chips that I roughly chop)
Flaky Maldon salt

Directions:
Preheat the oven to 350 degrees. Line an 8x8 square pan with parchment paper or grease with baking spray.

In an electric mixer, mix the sugars, and melted butter until combined. Add the egg and beat on medium-high until light in color and fluffy. About 3-5 minutes. See the photo below for an example of what you are going for. This step is crucial to aerate the dough, which is what you want. Once light in color, add the vanilla extract and orange zest and mix to combine. On low, stir in the dry ingredients. Using a spatula, stir in the dark chocolate and chopped dried figs. Spread into your prepared pan and sprinkle with flaky salt. Bake for 25-30 minutes, until a toothpick comes out clean.

If you like things gooier, lend closer to 25-27 minutes, and if you want them more baked through, opt for closer to 30 minutes.

Let cool completely, remove from the pan, and slice into bars.

blondie batter_stella parks

photo by Stella Parks

IMG_7773.jpg

Annie

Blueberry Cardamom Pop-Tarts

IMG_7701.JPG

My friend Lauren recently moved and became my neighbor at our apartment complex. I’ve lived in my apartment for a year and haven’t known a soul, but know I’m feeling settled and comforted knowing a few more faces around the place. She also just got back from a family trip to and around Glacier National Park. Lauren came back bearing gifts and brought me back a jar of blueberry jam made on a blueberry farm in Idaho.

IMG_7687.JPG

My mind instantly passed over jam on toast and skipped straight to using this little gift as the main ingredient in a baked good. I’ve made pop-tarts on the blog before, but I must be stalking Half Baked Harvest too much, and her unique pairing of flavors inspired these more mature pop-tarts. Blueberry and cardamom isn’t a typical pairing, but it’s not unknown.

IMG_7710.JPG

While quarantining with my parents I loved utilizing my mom’s spice cabinet to its full capacity and would sprinkle cinnamon and cardamom on my morning coffee. I’ve kind of been stuck on the flavor ever since and knew I wanted to use this unique spice in my tarts. The pastry is homemade, but don’t let it scare you. It really is a pinch to make and that’s where most of the flavor lies.

IMG_7689.jpg

Cardamom and cinnamon flavor the pastry, the Idaho blueberry jam works as the filling, and a little cardamom in the icing with crushed freeze-dried blueberries finish these off. I’m honestly just loving how pretty they are, but they are equally flaky and delicious.

IMG_7690.jpg

Blueberry Cardamom Pop-Tarts
yields 8 tarts

Ingredients: 
Pastry:
1¾ cup all-purpose flour
2 tsp. sugar 
½ tsp. salt
1 tsp. cardamom
1 tsp. cinnamon
¾ cup unsalted butter ( 1½ sticks), cold and cut into ½ inch cubes
3 tbsp. cold water
1 egg (for egg wash)

Filling:
½ cup blueberry jam or fruit preserves

Icing:
1 cup powdered sugar
¼ tsp. vanilla extract
pinch of cardamom 
1½-2 tbsp. of water
freeze-dried blueberries

Directions:
To make the pastry. In a food processor combine the flour, cinnamon, cardamom, salt, sugar and butter. Pulse until small clumps start to form. Add the cold water 1 tablespoon at a time. The dough may look dry, but let the processor do the work until the dough starts to come together. You don’t want the dough to be sticky, but if it is too dry you can add more water, 1 tablespoon at a time.

Turn the dough onto a floured surface and roll into a rectangular shape, 1/8-inch thick. Using a ruler or tape measurer, cut the dough into 3-inch x 4-inch rectangles. Take any extra dough scraps and roll back out to form more rectangles. The dough should make about 16 rectangles leading to 8 tops and bottoms. Transfer the 8 bottoms to parchment-lined baking sheets. 

To assemble. Spread 1 tablespoon of blueberry jam onto the center of the pop tarts, leaving a ¼-inch border. Brush the egg wash along the exposed edges, and then carefully, using a metal spatula to help you transfer without breaking the dough, place another rectangle of pastry on top. With your fingers gently press around the filling to help seal the edges together. Using a fork, go along the edge to crimp the edges together. Repeat until you’ve used all of the dough. Poke a few holes or slice a couple of indentions in the tarts, for steam to release while baking. Place in the fridge to firm up for 1 hour or in the freezer for 20 minutes. 

Preheat your oven to 400 degrees. Bake the tarts for 18-20 minutes until the edges are just lightly golden brown. Let cool completely before icing. 

To decorate. Once the tarts are cooled, in a medium bowl, whisk together the powdered sugar, cardamom, vanilla extract, and water. If your icing is too thick, you can add more water, but you want the icing to be the consistency of thick paint so they don’t run right off the tarts. Spoon a little bit of the icing on to each cooled pop-tart. Using your fingers, simply crush the freeze-dried blueberries over the tops of the tarts, while the icing is still slightly wet. Allow the icing to harden completely, about 2 hours, before serving. 

*Recipe notes:
If you do not have cardamom
: You can omit it. However it really makes the recipe, so I suggest buying the spice from your grocery store's bulk spice section so you aren’t committed to a pricey bottle of spice. I love cardamom in my coffee. You can also use pumpkin pie spice in exchange for the cinnamon and cardamom. 

If you don’t love blueberry: This recipe would be great with a raspberry! Just swap for raspberry jam and freeze-dried raspberries. Any berry pairs well with cardamom.

If you don't have a Food Processor: You can use your fingers or a pastry cutter to mix the butter with the flour until the butter is pea-sized. Slowly drizzle in the cold water as directed.

To Make Gluten-Free: Use an equal amount of your favorite cup for cup gluten-free flour blend in place of the all-purpose flour. I actually used this GF flour in this recipe!

IMG_7712.jpg

Annie

Lite Bite: Hatch Chili Chicken Enchiladas

IMG_7214.JPG

Hatch Chili Chicken Enchiladas

Ingredients:
8 tortillas (your favorite flour or grain-free tortillas are great, I lucked out with these insane homemade coconut flour tortillas I got at my nearby farmers market)
1 ½ cup shredded rotisserie chicken
1 green bell pepper, diced
½ yellow onion, diced
½ cup salsa (a hatch chili or a verde salsa is preferred, but I used a red salsa I had and they were great)
3/4 cup shredded Hatch Chili pepper jack cheese*

Directions:
Preheat your oven to 375 degrees. 

Sauté the bell pepper and onion in a cast-iron skillet. I didn’t even use oil, I added in a splash of water got them cooked and kept them from sticking. Once the onions are translucent add the shredded chicken to the pan just to combine. Transfer the filling mixture to a plate and wipe out your skillet.

Pour 1/2 cup of salsa in the bottom of your cast iron skillet or a 9x13 pan and set aside. In a small saucepan, heat the other 1/2 cup of salsa over medium heat. Once warmed it’s time to assemble. Dip each tortilla in the warmed salsa making sure to coat the front and back of the tortilla. Lay on a plate and fill with about two tablespoons of the chicken mixture. Roll them up and then lay in your pan seam side down. Pour any leftover salsa over the top of the enchiladas. Top with the shredded cheese and then bake for 8-10 minutes until the cheese is melted.

Top with avocado, tomatoes, cilantro, red onion, cilantro etc!

*This recipe can easily be adapted to not be “hatch chili.” Use any salsa you like and regular pepper jack or Monterey jack if you want to tone down the spice a bit.

IMG_7210.jpg

Happy hatch chili season!

Annie

Lettuce Wrap Sandwich

Heyyo! These lettuce wrap sandwiches have been rocking my world lately. They are nothing new, but I finally created my own instead of ordering my favorite (for $14) from East Hampton in Dallas. I’m sorry but I can’t pay $14 for vegetables. There is a learning curve on figuring out how to wrap these babies up, so keep scrolling for the ingredients deats and a little vid for the how-to!

A7C69AC2-235C-4C9D-8B5D-6BE5A793F504.jpeg

Lettuce Wrap Sandwich
serves 1

Ingredients: (use these as a guide but feel free to fill your wrap up with any of your fave sandwich fillers)
3 slices of smoked turkey deli meat
3 slices of salami
2 slices of tomato, cut in half
1 thin slice of red onion, cut in half
2 sandwich pickles, cut down the middle
1/4 of an avocado, thinly sliced
micro greens or sprouts
3-4 leaves of iceberg lettuce
condiment of your choice
salt and pepper
parchment paper

Directions:
Tear off a rectangle shape piece of parchment and lay on a cutting board. Lay your leaves of iceberg onto the parchment, flattening them out and creating a rectangle shape. Overlap them, not leaving any holes. Make sure to leave a border of parchment paper around the lettuce.

Now start to layer the sandwich ingredients. You want to lay the ingredients in the middle of the lettuce and build up. If you are doing mayo or mustard, start with a spread of that on the lettuce. Then turkey, salami, pickles, tomatoes, red onion, avocado, sprouts or microgreens, and finish with a sprinkle of salt and pepper.

Now it’s time to roll. First, just like a burrito, you will fold in the sides of the lettuce. Then at the side closest to you, using the parchment paper to guide, begin to push everything in and tightly roll. As you make a roll, pull the parchment out so it doens’t get rolled up inside. Keep going, rolling and pulling the parchment out. Once you are almost to the end, fold in the sides of the parchment and then finish your roll. I like to seal it with a piece of tape and then cut in half. Enjoy!

Annie