2 Ingredient Shakshuka: MY Go-To Clean Out The Fridge Meal

IMG_2250.jpg

I pride myself on clean out the fridge meals. It’s honestly shocking what I can do with a near empty fridge. My mom can attest to this. Anytime I’m over she’ll say “oh we have nothing to eat!,” but a few minutes later and I have some kind of loaded salad situation or a plate of nachos. My past roommates could say the same.

Today’s meal is exhibit A of me having nothing but a few eggs in the fridge and no effort to go to the store. I first started making this meal a couple years ago when I lived with my roommate at the time, Kenzie. She had a half empty bottle of marinara, I had two eggs, and we had an abundance of basil growing in the backyard. Enter: shakshuka.

IMG_2252.JPG

Shakshuka originates from North Africa, made often with tomato sauce seasoned with cumin, paprika, chilis, garlic, and nutmeg. My version lends itself more Italian thanks to a jar of pre-made marinara and some basil. I call it 2-ingredient because all you need are eggs and sauce, but if you have some basil and red pepper flakes your dish will have a little more pizzazz. Oh, and salt and pepper don’t count in the number of ingredients, don’t @ me.

IMG_2248.jpg

2 Ingredient Shakshuka
yields 1 serving (can easily be doubled to serve 2, see not below)*

Ingredients:
1 cup marinara sauce
2 eggs
salt and pepper
optional: fresh basil and red pepper flakes

Directions:
In an 8-inch or omelet size pan, heat your marinara over medium heat for 1 minute. Using a small spatula, create 2 wells in the sauce that you can crack the eggs into. Crack and carefully lower egg into each well. Continue to cook over medium for 5 minutes. Then cover with a lid and cook for one minute to finish cooking the whites. Immediately remove from heat to avoid over cooking the yolks.

Sprinkle the top with a little salt and pepper, red pepper flakes and fresh basil if you have it. Grab a fork and a placemat or towel to set your hot pan on, and enjoy straight from the dish!

*If you are making for 2, I find a cast iron skillet to be the perfect size pan for twice the sauce and 4 eggs. Once cooked, scoop into shallow bowls and serve with crusty bread and a green salad for a complete meal.

IMG_2247.jpg

**Disclosure, you do not need to reserve this meal for simply cleaning out the fridge. It’s perfectly acceptable to buy a new jar of marinara and a new carton of eggs just for this recipe!

Annie

Crock-Pot Carnitas

This is it you guys, this is it. Officially my go to recipe for cooking for friends, party food, pot-lucks etc. Crock-pot carnitas are a zip to make, but totally bring on the wow. Not to mention they make a truck load, so it's a perfect way to feed the masses.

My mind and my stomach have been on a taco kick recently. One of my co-workers was recently sharing with me how she loves to make carnitas. She was going on about how easy, fresh and healthy they were. Okay, sold. Give me the recipe. So thank you Mel, this one is for you!

My pork butt was a little over 7 lbs. which is huge, but that was the smallest I could find! It barely fit in my crock pot. I think it made enough carnitas for the whole neighborhood. But really. Some for me, some for my roommates, some for sis and husband, and some for the freezer to pull out on a rainy day. Search your market and you can probably find a smaller butt. I was limited and hungry so just went with it. A pork shoulder is interchangeable for this recipe. You can typically find small pork shoulders in the grocery store!

That being said the measurements for this recipe are a little loosey goosey because your pork butt size may vary. Just go with it and trust your self, I promise you can't mess this up. 

Crock Pot Carnitas

Ingredients:
4-5 lb. pork butt roast or shoulder  (bone-in or boneless, either works)
cumin
chili powder
garlic powder
salt and pepper

Accompaniments: 
white corn tortillas
cilantro, chopped
avocado slices
lime wedges
chopped red onion, pickled onions, pico de gallo etc.

Directions:
Rinse and pat dry the pork butt. Put just about a 1/2 inch of water in the bottom of your crock pot. Season both sides of the pork with all of the seasonings. I did about one teaspoon per side (roughly 2 tsps. of each seasoning). Place in the crock-pot. Turn on low and let cook for 6-8 hours or until tender. My pork butt was a bone-in. The best part was getting to reach in and just slide the bone right out of the tender meat.

Using two forks shred the carnitas. Add more seasoning if needed. Warm tortillas on a griddle. Serve carnitas with some pico, cilantro, fresh avocado and a squeeze of lime! 

Perfect served as is, but I also can't wait to use the meat in taco salads or on nachos. Melanie said she uses her leftovers in quesadillas and as enchilada filling! I'm also thinking it wouldn't be half bad mixed with a little BBQ sauce for a take on pulled pork. 

I'm not sure what it is about this recipe, but when I was snapchatting while I was cooking, you guys were going crazy. Which I love. And these  carnitas deserve that kind of love because they are that good. So here you go my friends, crock-pot carnitas for your stomachs to enjoy! 

Annie

Baked Egg Sweet Potato

A quick recipe post because I couldn't wait to share it! I am lucky enough to work pretty close to home, so I love when I have the chance to run home for lunch instead of shoveling in a sub-par salad at my desk. 

I've had this image of an egg baked in a sweet potato floating around in my pool of recipe ideas for a while. Yesterday I was able to sneak home for lunch and finally got around to making it. It's the same idea as baking an egg in an avocado.

A little coconut butter, salt and pepper then a runny baked egg make this the most satisfying lunch. If really helped me get over the mid day hump of hump day.

image.jpg

Baked Egg Sweet Potato

Ingredients: 
1 sweet potato
1 egg
coconut oil
salt
pepper
red pepper flakes

Directions:
Cook your sweet potato to your desire. I like wrapping it in foil and placing in the crock pot on high for 4 hours or low for 6-8 hours. You can bake it wrapped in foil at 400 degrees for 40-50 minutes. Or the easiest, by popping it in the microwave for 10 minutes. 

If you cooked your potato in the oven, keep it on. If you didn't, preheat your oven or toaster oven to 400 degrees. Once your potato is cooked, make a cut across the top and open your sweet potato. Scrape the insides. Keeping it all in the skin, mix a pat of coconut oil, salt and pepper with the sweet potato insides. Create a little well in the potato. Crack the egg right into the potato. Place it back in the oven and bake 10-15 minutes, or until the egg is set. I like my egg running so 10 minutes was enough. 

Top with a little more s&p, and some red pepper flakes for heat!

image.jpg

Annie

Low Labor Breakfast

Happy Labor Day everyone! Since it's still the weekend bites will be waiting until tomorrow. In the meantime, it was too appropriate not to share this "low labor" breakfast recipe with you on this splendid Labor Day! Some call them overnight oats, I call it sleeping in oatmeal, which I hope you all did this morning.  I didn't, but I haven't slept in a day in my life. #TeamEarlyRisers. 

I love how perfect overnight oats are for on-the-go breakfasts. Make them the night before and you get an extra 10 minutes in the morning. The mornings I have to get to work early, I don't like to eat breakfast right away. This is the perfect thing to take to work, leave in the fridge while I catch up on emails, then pull out about an hour later!

I've tried making overnight oats a handful of times and every time I wonder how any one can really enjoy them. They always turn out tasting like soggy, no flavor oatmeal. Uhh gross. Most recipes have a laundry list of ingredients like oats, milk, yogurt, a mashed banana, flax seed yadi dadi da. For yours and my enjoyment, I give you easy, perfect, flavorful overnight oats. 

I use a mixture of almond milk and water. I think this is because I typically only make oatmeal with water, but a little bit of milk is needed to get the right texture, so the combo it is. I also add in a small spoonful of almond butter to help thicken it up and make them extra creamy. I do this in my regular oatmeal and it's the ultimate addition.

Overnight Oats:
serves 1

Ingredients:
1/3 cup Purely Elizabeth original ancient grain oats
1/2 cup almond milk
1/4 cup water
1 Tbsp. almond butter (optional)
splash of vanilla extract
shake of cinnamon
fruit for topping

Directions:
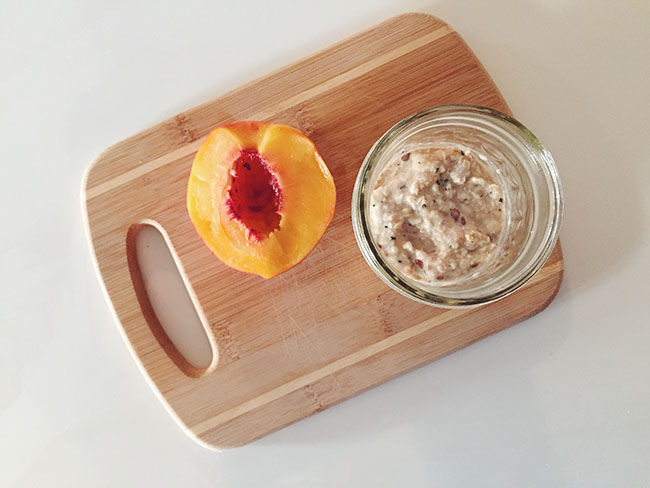
In an 8 oz size mason jar, combine oats, almond milk, water, almond butter, vanilla extract and cinnamon. Screw on the lid and let it sleep overnight in the fridge. The next morning, give it a good stir and top with fruit like blueberries, raspberries or sliced peaches!

I'm a big oatmeal person but I usually only eat it in cold weather months. Recently, I've been having a big oatmeal craving. I love how overnight oats are essentially the summer version of oatmeal! Thick and creamy like oatmeal, but cold and refreshing enough for summer. I guess refreshing is kind of a weird word to describe oatmeal, but they truly are so just go with it.

Annie

Quinoa Fried Rice

I really have no idea why it has taken me so long to post this recipe. In school I made quinoa fried rice almost every Sunday night. It's the ultimate healthy comfort food! I always have frozen veggies in the freezer and quinoa stocked in the pantry, so it's a staple meal in my repertoire! 

This weekend while in Dallas, we had a sushi dinner at Shinsei. They told us they were known for their fried rice which they could make with white rice, brown rice or quinoa. Quinoa I hear?? They just spoke my love language. The dish came out with a fried egg on top instead of scrambled into the rice. Okay ya, so into that. I instantly knew I would be coming home to make it. I've now been eating it every night this week!

Cheat trick. I'm obsessed with this stuff. It's so easy to throw in while cooking and easier than trying to keep fresh garlic on hand. Second trick to my fried rice is using tamari instead of soy sauce. It's basically a gluten free less sodium version of soy sauce. It's still made from soy beans but leaves out the wheat and crazy saltiness you get from soy sauce.

Quinoa Fried Rice
serves 1

Ingredients:
3/4 cup cooked quinoa
2 tsp. coconut oil or olive oil, plus extra or frying your egg
combo of frozen or fresh corn, peas, edamame, carrots, broccoli etc.
1/2 tsp. minced garlic
2 Tbsp. tamari
1 egg
2 green onions, chopped
3 basil leaves, chiffonade (optional)
pepper
paprika

Directions:
Cook quinoa according to package directions. Quinoa is a 2:1 ratio. For example 2 cups water for 1 cup quinoa, or 1 cup water for 1/2 cup quinoa. I like to cook up a big batch and just keep it in the fridge to turn into fried rice or throw in salads. 

To make the fried rice, add 2 tsp. of your choice of cooking oil to a pan over medium heat. Cook frozen veggies until tender then add in garlic. Add quinoa to pan and mix everything together. Drizzle over tamari or soy sauce. Cook everything together until heated and combined. Transfer to a serving dish and wipe out your pan. Add a little more oil to the hot pan then crack your egg in slowly. Cover with a lid and let it fry, don't flip it! This will keep the yolk pretty!

Once your egg is fried slide it over the quinoa and top with chopped green onion and basil! I like to add some pepper and paprika for presentation! Eat with chopsticks and you now have healthy asian food at home!

My ultimate single girl meal. Dinner for one, check!

Annie